Service Invoicing
The Service Invoicing process has been ‘refreshed’. The main purpose of this change is to modernize and speed up the invoicing process, reducing keystrokes and introduce new functionality.
The service invoicing screen now looks like this.
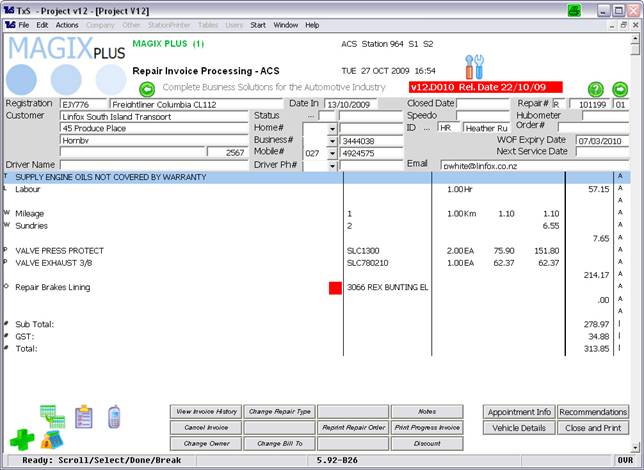
• The first column is the ‘line type’. Valid line types are ‘T’(Text), ‘L’(Labour), ‘W’(Workshop charges), ‘P’(Parts),’O’(Outwork),’R’(Recommendations).
• A
 in a row indicates the line
is ‘incomplete’, for example, Outwork not priced, Parts on Order or not Priced,
Technician still clocked on.
in a row indicates the line
is ‘incomplete’, for example, Outwork not priced, Parts on Order or not Priced,
Technician still clocked on.
• The last column is the ‘Job#’. This is used to split the invoice to multiple jobs. Please see section on ‘Split Invoices’.
Using the New Service Invoicing Process

The ‘Buttons’ i.e. ‘View Invoice History’, ‘Change Repair Type’ etc are the same as the previous version of Service Invoicing. The only change is that some of these were in ‘sub-screens’.
Adding a ‘Line’ to a Service Invoice
Click the  button to add a line to the invoice. You
can use F12 on the keyboard instead of clicking on this button.
button to add a line to the invoice. You
can use F12 on the keyboard instead of clicking on this button.

Magix will prompt you for the line type; a message shows the valid ‘line types’ at the bottom of the screen.
• ‘T’ Text, this is self explanatory.
• ‘L’ Labour, takes you to the standard Labour Entry screen.
• ‘W’ Workshop Charges will display the following screen.
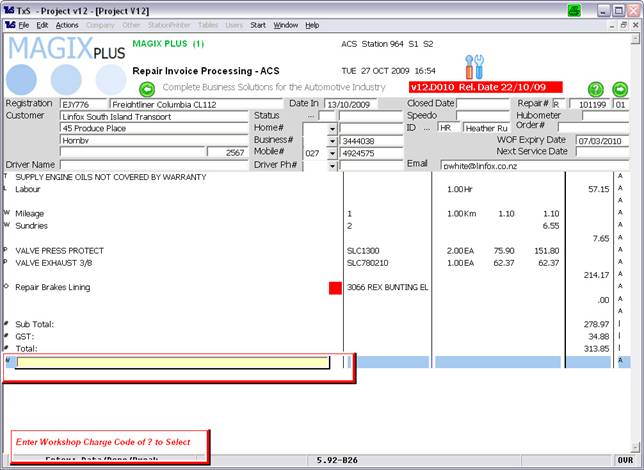
The prompt at the bottom of the screen asks you to enter the Workshop Charge Code or push ? to select from the Workshop Charge table.
If you push ? you will get the new ‘Quick Select Workshop Charges Screen’.

Click on the Workshop Charges you wish to use, then click DONE.
This will then add all selected Workshop Charges, prompting you for Quantity, Price etc.
Note: This sort sequence for this screen is based on ‘Rank’. The top 10 most used items are listed first sorted alphabetically, then a blank space is shown, then items 11-20 are shown, then any ‘auto charge’ items and then the rest.
• ‘P’ Parts will take you to the Parts Invoicing screen. Please note this depends on configuration as not all dealerships allow this operation in Service Invoicing.
• ‘O’ Outwork will show the following screen.
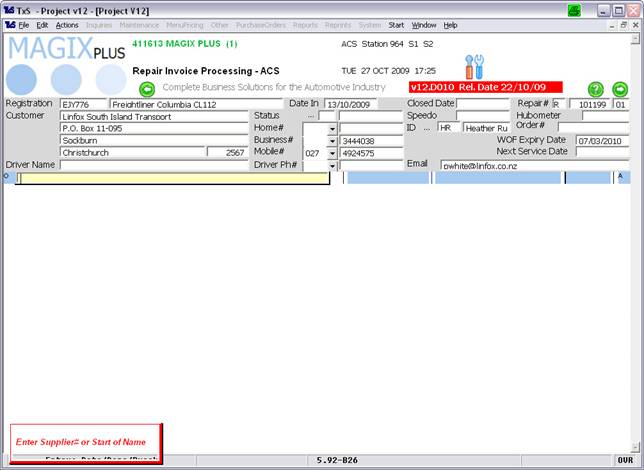
Enter the Supplier# or Start of Name you wish to create the outwork order for.
Changing or Deleting a ‘Line’ on the Service Invoice
To do this simply double click on the line.
Split Invoices
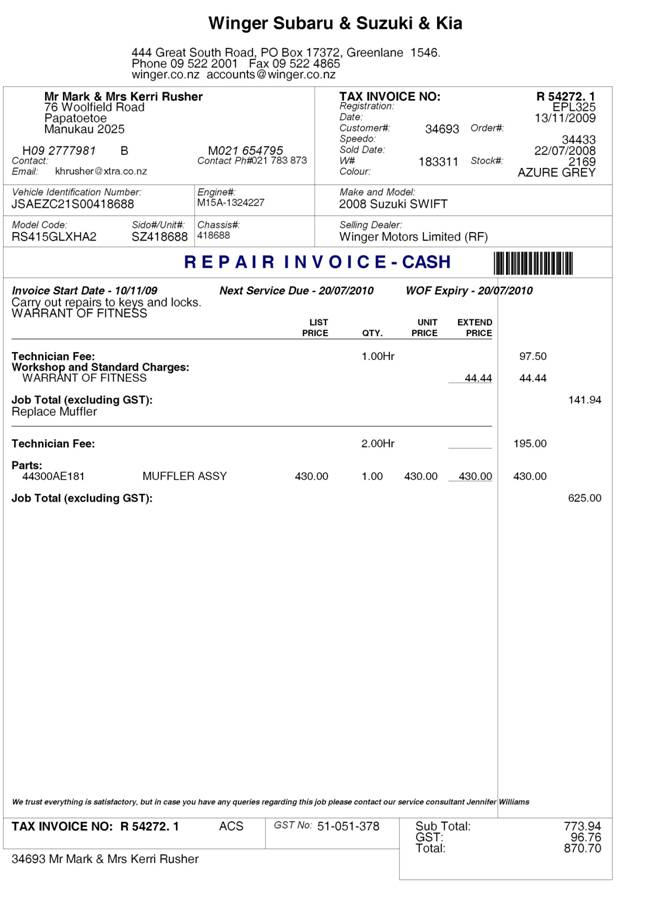
A ‘split invoice’ lets you separate different ‘jobs’ on a single invoice, so it is effectively an invoice within an invoice. An example of a spilt invoice is below.
To ‘split an invoice’ click on the  icon.
icon.
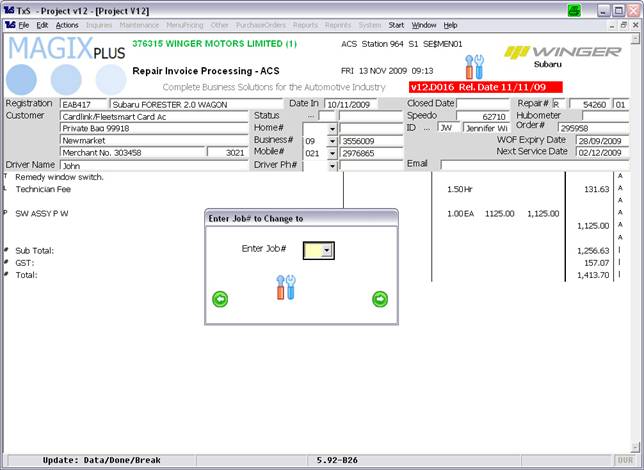
Enter the new Job#. Job# is letters, A B C etc. By default all items on an invoice are Job A. So to split the invoice to 2 jobs enter a Job# of B.
Then select the invoice lines you wish to move to the other job, in this example B.
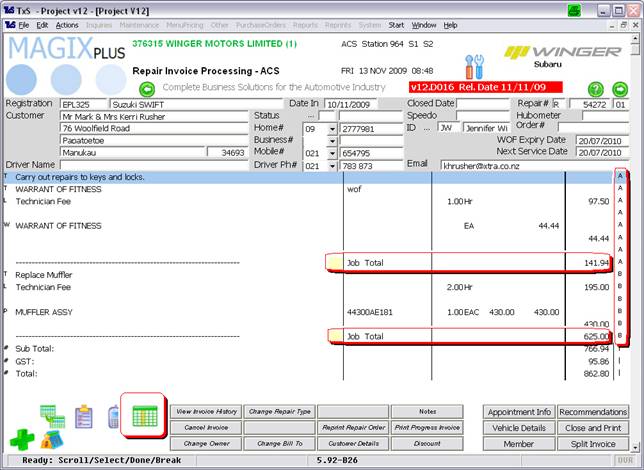
A Split Invoice will look like this.
Note: In the next version of service invoicing you will be able to ‘split an invoice’ to a customer other than the Invoice customer, i.e. Job A Customer# 123 & Job B Customer# 432