Code
(Otherwise known as Product Code)
The code field relates directly to many other modules of Magix; assigning a code to a part enables you to not only efficiently organise your parts stock, but also simplify stocktaking procedures by being able to count each section of your stock independently of the next. More functions are described below.
These Product Codes are assigned in the following location: Parts Inventory -> System -> Product Codes -> Add and Modify
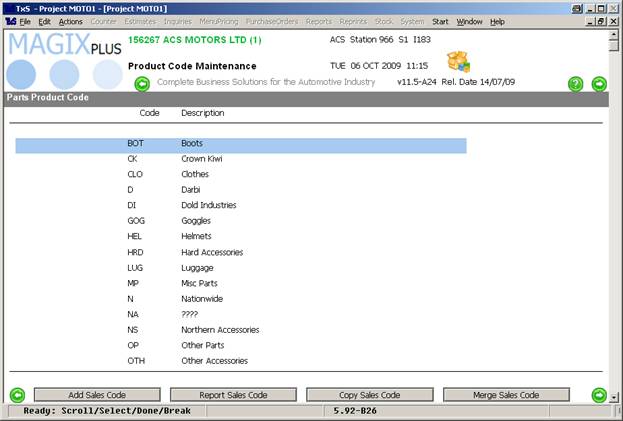
In the Product Code listing are categories of your parts; whether you organise them by Manufacturer, type, specific model or more.

Here is
a typical Motorcycle franchise setup. Note the descriptions; Northern
Accessories and Dold Industries being manufacturer names, Boots and Clothes etc
as categories and Misc Parts as a generic category. You can set these as you see
fit.
Click here for specific instructions pertaining to changing a part on an actual part in your stock.
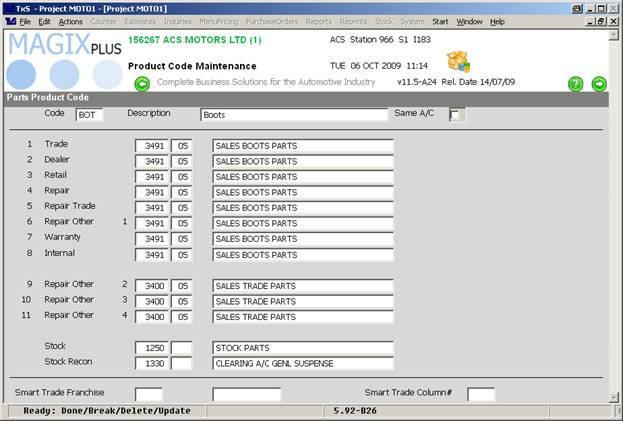
Each Product Code also has specific accounts assigned to it in the General Ledger Chart of Accounts; correctly setting these attributes along with the Product Code will give you in depth reporting abilities. Here is an example of an account listing from the Boots category above:

As you
can see above; each category of transaction is setup individually. The specific
details in the table may all be the same, but most likely different. Yours
*will* differ from the above image.
Those account numbers are assigned in the General Ledger Chart of Accounts which is located at: Administration -> GeneralLedger -> GL Chart -> Add Modify
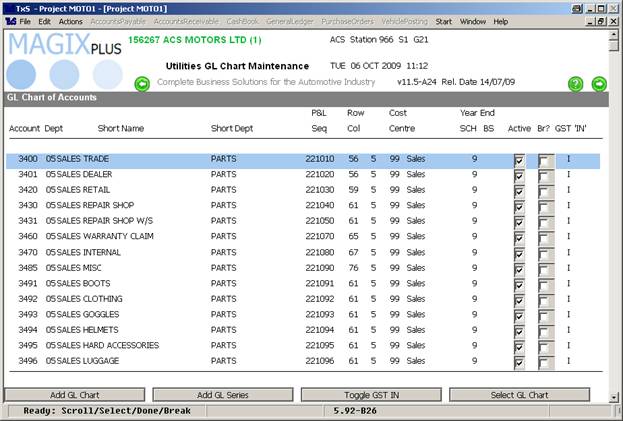
As we are talking about Parts Inventory the Dept No is 05; you will see a listing as below:

This is
where your accounts are setup for use in Product Code Maintenance in this case
(and every other part of the system).
Click here for instructions and further explanations pertaining to the GL Chart.
Note in the above image the column label “Account Seq”; this sequencing number is used to organise the data displayed in the various reports that you run in the Administration module.
Click here for further information and instructions regarding the Account Sequence.
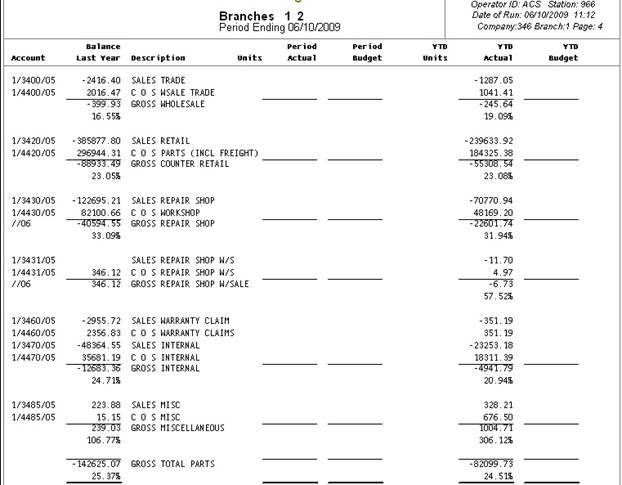
An example specific to the Parts Inventory module is below:

As you
can see above, some of the categories set in the GL Chart are displayed above
and in the order of the Account Seq numbers.
Descriptions of buttons