Turning your selection into a Quote or an Appointment
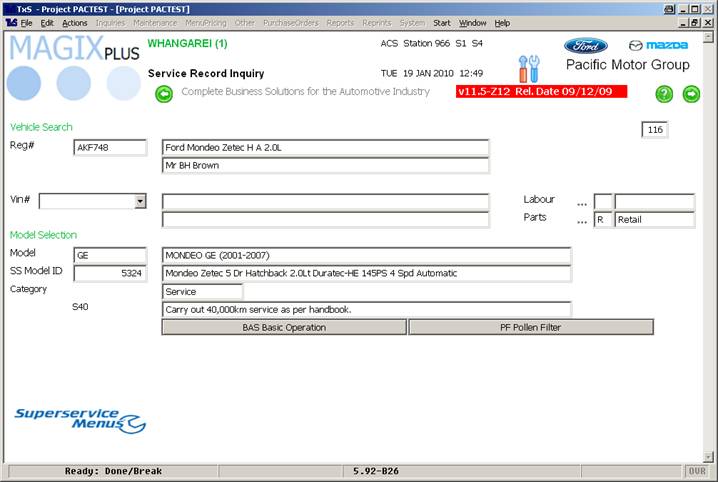
Once you have selected the desired operation you are presented with the following screen, in this example I have chosen a 40k scheduled handbook service for a 5 door Mondeo:
I then chose ‘BAS Basic Operation’ from the selection and was presented with the following:
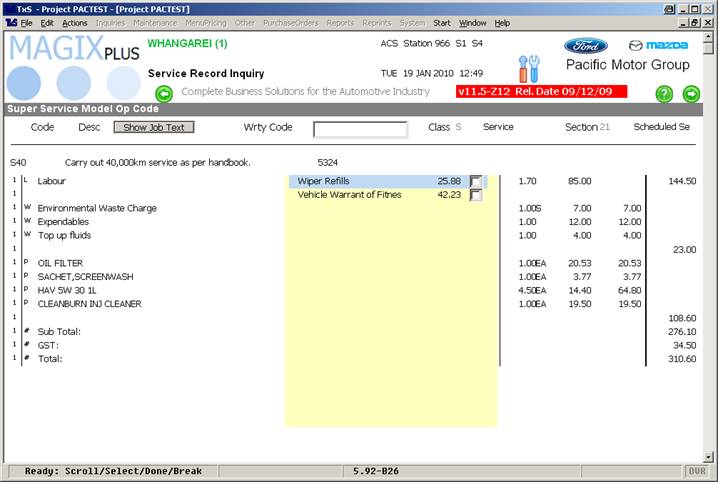
The selections above in yellow are the Upsell Options that are available to you; this is a good chance to ask the customer if they would like an upgrade to their requirements for the job.
Note: Click here to learn more about ‘Upsell Items’ and how to create and maintain them. This is created and maintained by the dealership; if you need assistance with setting up your Upsell Items please use this link to email ACS Support.
Selecting an Upsell Item will add it to the job; in this example I will keep it simple and not bother adding any.
The next screen shows the run down of the job you have just created:
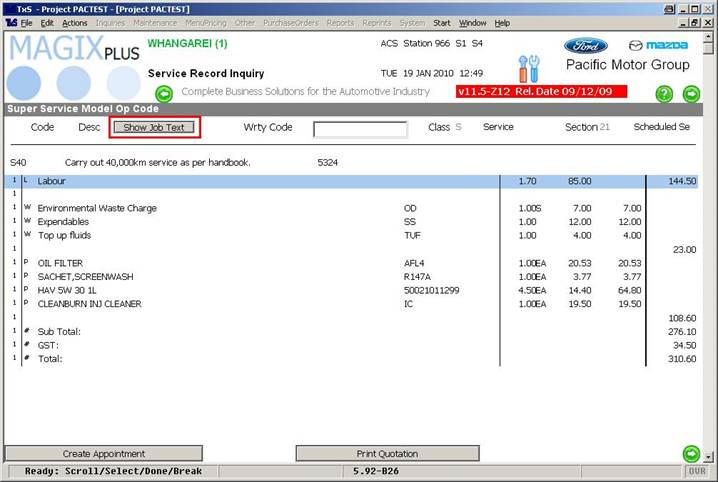
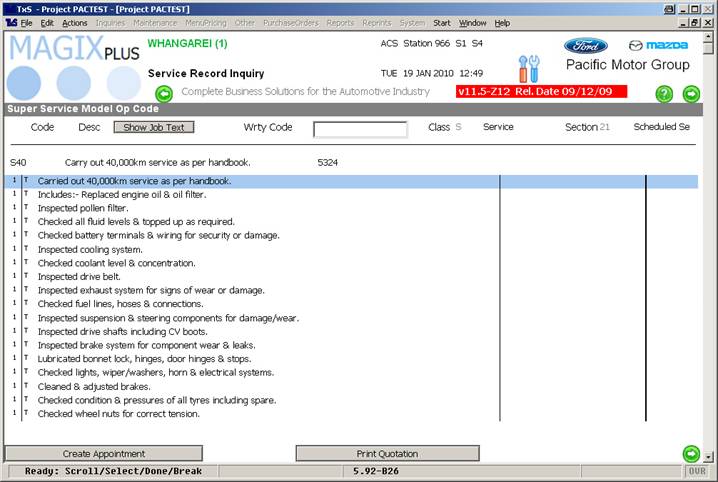
Note: The ‘Show Job Text’ button will show all of the instructions and details that will be printed onto the RO and the final invoice for the customer, as below:
You are then given the option of ‘Create Appointment’ and ‘Print Quotation’. If creating an appointment at this stage you are asked to ‘Enter your Salesperson ID’ as per usual before confirming the details of the job as below:
Note 1: You can adjust the labour line simply by double clicking it and adding a new value; when that is done Magix will automatically recalculate the totals. If there are any inconsistencies with the values and prices for the job please use this link to email the SuperService representative at ACS Support.
Note 2: If you used the button to ‘Print Quotation’ in the options above, the RO number is allocated to the quote; at present there isn’t a way to turn a quote into an RO; the number is used up and the next RO created will use the next number in the sequence.
Note 3: If a customer is assigned a discount it will be applied at this point as well; if there are any issues with a customers discount, please use this link to email the SuperService representative at ACS Support.
Note 4: If you had gotten to this point through the ‘Create Appointment’ button on the main Service interface, Magix assumes that you are creating an appointment and the ‘Create Appointment’ and ‘Print Quotation’ buttons will be greyed out. Continuing past that point will skip salesperson ID entry automatically as you had already logged in.
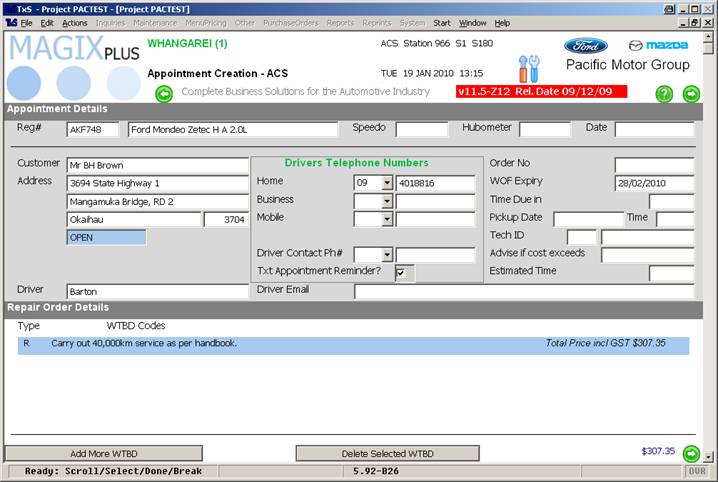
At this point you could Add More WTBD codes (Work To Be Done) or delete items. Adding more WTBD allows you to add more work using both the SuperService Lookup interface described here as well as the traditional style where you enter everything manually.
Note: Tthe confirmed pricing indicated by the WTBD codes and the total on the bottom right; if there are any discrepancies please use this link to email the SuperService representative at ACS Support.
In this example I will simply accept what is there and continue to the following screen as below:
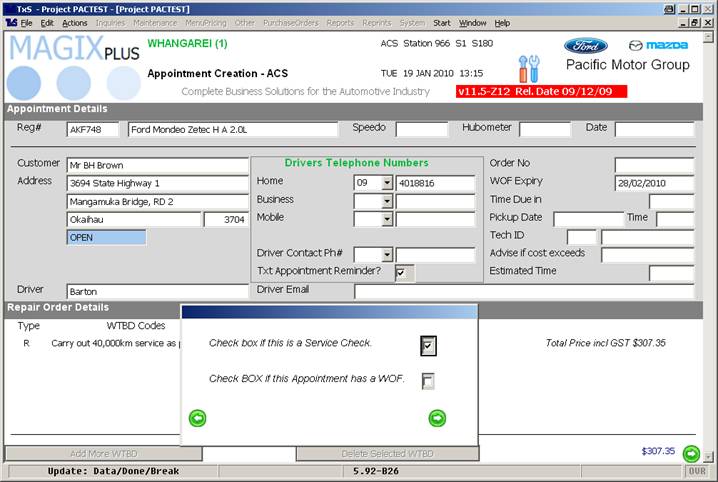
Ensure these boxes are checked if this job contains either a Service Check or a WOF. This enables Magix to prompt for expiry details as per usual.
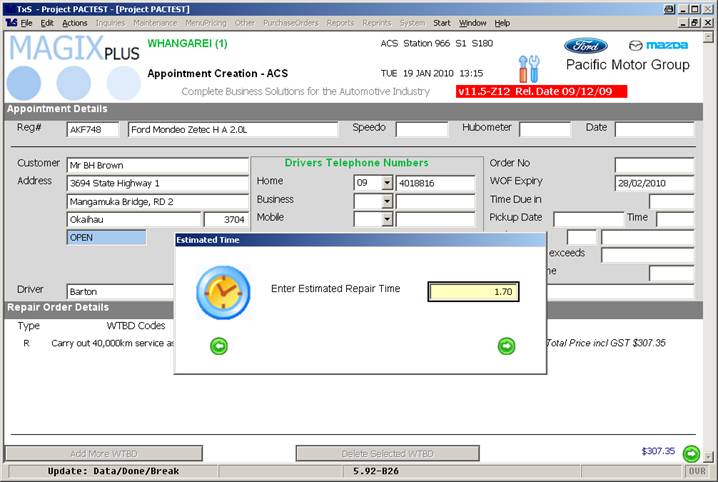
Continuing to the next screen allows you to confirm the estimated time for the job, ensure that you add the time from the service operation to the Upsell options you have chosen and continue as below:
The next screen allows you to review the picking list that is automatically sent to your Parts Department, as indicated below:
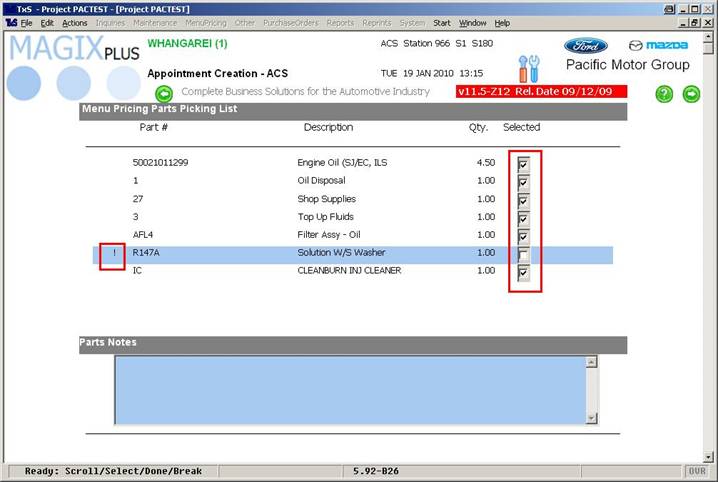
Note 1: You will see an exclamation point indicated above; this is shown when there is a discrepancy in stock, perhaps because the Parts Department is out of stock. The other indicated section allows you to leave out specific items if a customer doesn’t want them or they are indeed out of stock for example; this ensures that you won’t order an item that can’t or shouldn’t be supplied.
Note 2: If the client is a Lease Company the items that they do not require will be automatically deselected; click here for information regarding setting up Lease Companies and Lease Exclusions. For further assistance with setting up Lease Companies, please use this link to email the SuperService representative at ACS Support.
The next screen (after verifying the parts makeup) is the actual booking of the job, as below:
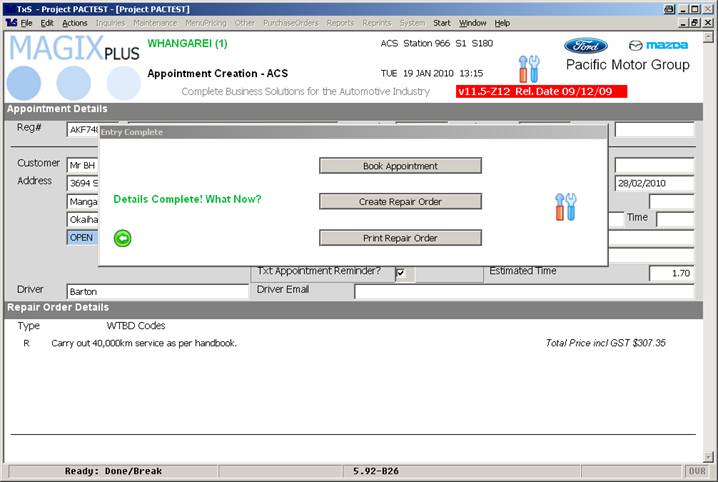
These three options are the same as always and give you your normal options. From there; selling Workshop Charges, adding Labour and selling Parts onto the job are the same as always through ‘Invoicing’ in the main Service interface.